Showing posts with label Washi Tape. Show all posts

Sunday, November 9, 2014

Sunday Funday Technique 7

Hello everyone .

Another tutorial on making your own washi Tapes

 This video on Washi Tape done by Beckie in her you tube channel.


Hope you all will have fun and enjoy ...

Don't forget to follow our blogs for regular techniques and other DT projects.


Thanks


DT-Neha

Wednesday, October 22, 2014

Washi Tape Wednesday

Hi Everyone, Sarah-Jane here!

I am a little unwell this week so I have shared a post from my personal blog about making your own Washi Tape.........

I have a lot of washi tape, just a little bit addicted I'd say but really I can stop any time............

Although I do have that much I still find it difficult to find the right tape for the right project, so ............ lets have a look just how easy it is to just make your own.

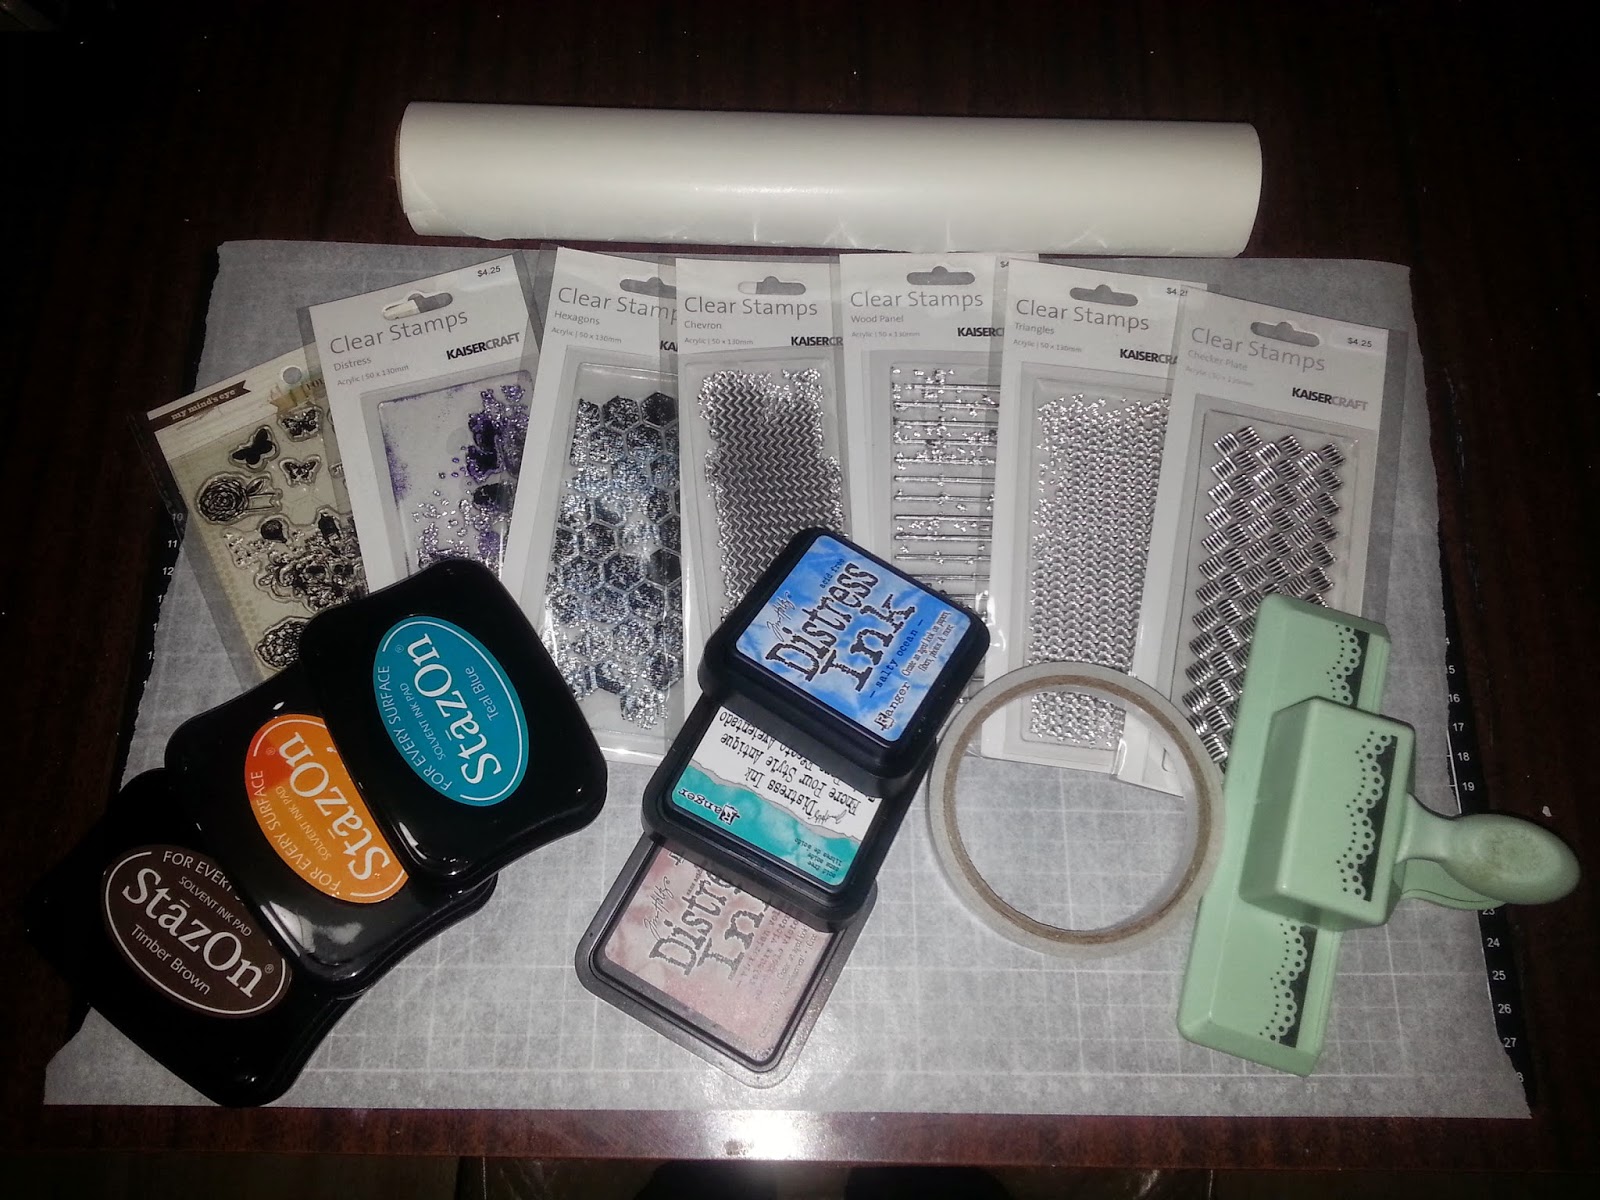
Here is what I used.....


- Baking Paper
- Double Sided Tape
- Various Patterned Stamps
- Permanent Ink Pads
- Distress Ink Pads
- Decorative Edge Punch 


First you need to stick a length of double sided tape to the shiny side of the baking paper, like the picture above. Make sure you use baking paper and not wax paper as the stamping won't stick to the wax paper.


Then you can cut the paper into strips, this can be done after decorating the strips or before, as you can see I chose to do it before I decorated the strips.

Then using various stamps and inks go crazy......... decorate each strip as much or as little as you like. You can keep the backgrounds plain or as I have done lightly run a distress ink pad over them to create color. 


And here is what I came up with, I even used a border punch on the bottom one. 

Well that's it..........Very Easy, and the sky is the limit with what you can come up with and no one will ever have anything like it!

Well thats all for this week, don't forget to come back on Monday to see what Mixed Media Art Journal page I come up with............ here is a sneak peek:


Well see you all next week don't forget to check out my blog and also Neha's Store.

Caio


Wednesday, October 15, 2014

Washi Tape Wednesday - DT Sarah-Jane

Hi Everyone, and welcome to another installment of Washi Tape Wednesday! This weeks technique come directly from the God of Craft........Tim Holtz. This week we are going to make some Washi Tape Flowers. So I am going to let Tim Holtz explain how to make them...


And here are a few of the ones I made:


They each took about 5 minutes to make and are very simple. I will admit while any kind of Washi Tape will work, Tim Holtz's Tissue tape does work the best as it is less tacky than other brands. Still they all look great.

As usual you can purchase many different types of Washi Tape from Auzz Trinklet's N Krafts, and check out my blog for more ideas just click the picture below.

Well that all for this week, stay tuned for more wonderful ways to use Washi Tape next week! 

Caio


Wednesday, October 8, 2014

Washi Tape Wednesday - DT Sarah-Jane

Hi, Sarah-Jane here again, this time to share some techniques........

Washi Tape, we all have some and if any of you are anything like me you probably have way too much! Last count I had 236 rolls of Washi Tape and that number grows every week! Here is just a small selection of my many rolls......


I am not sure how many rolls are in this triple layered jar, but I do know that I need another 2-3 more jars just to hold my stash!

Anyway, every week I will be publishing a short post with different things you can do with Washi Tape. There are so many possibilities, they are literally endless........

This week I am going to show you how Washi Tape can be used in place of patterned paper and then put through your favourite die-cut machine to produce interesting elements for scrapbooking and card making. Here is what I came up with:


All of the elements on each of the cards is made using Washi Tape stuck to plain white card stock to give the tape a base, and to add some thickness.

Card #1 - Hello


As you can see in the picture below the balloon was made by putting strips of yellow chevron, solid black, wood looking Washi Tape onto a piece of white card stock then putting it through my Big Shot. The Balloon was also adhered using foam squares to make it 3D, so that it pops off the card a little.


Card #2 - Love


This card was made again by sticking lines of Washi Tape to card stock and then running it through my big shot. I used foam squares to adhere the word "love" to the frame and the same with the small black frame in the top corner. Both lots of black elements are covered with Glossy Accents to give them some shine and dimension. 

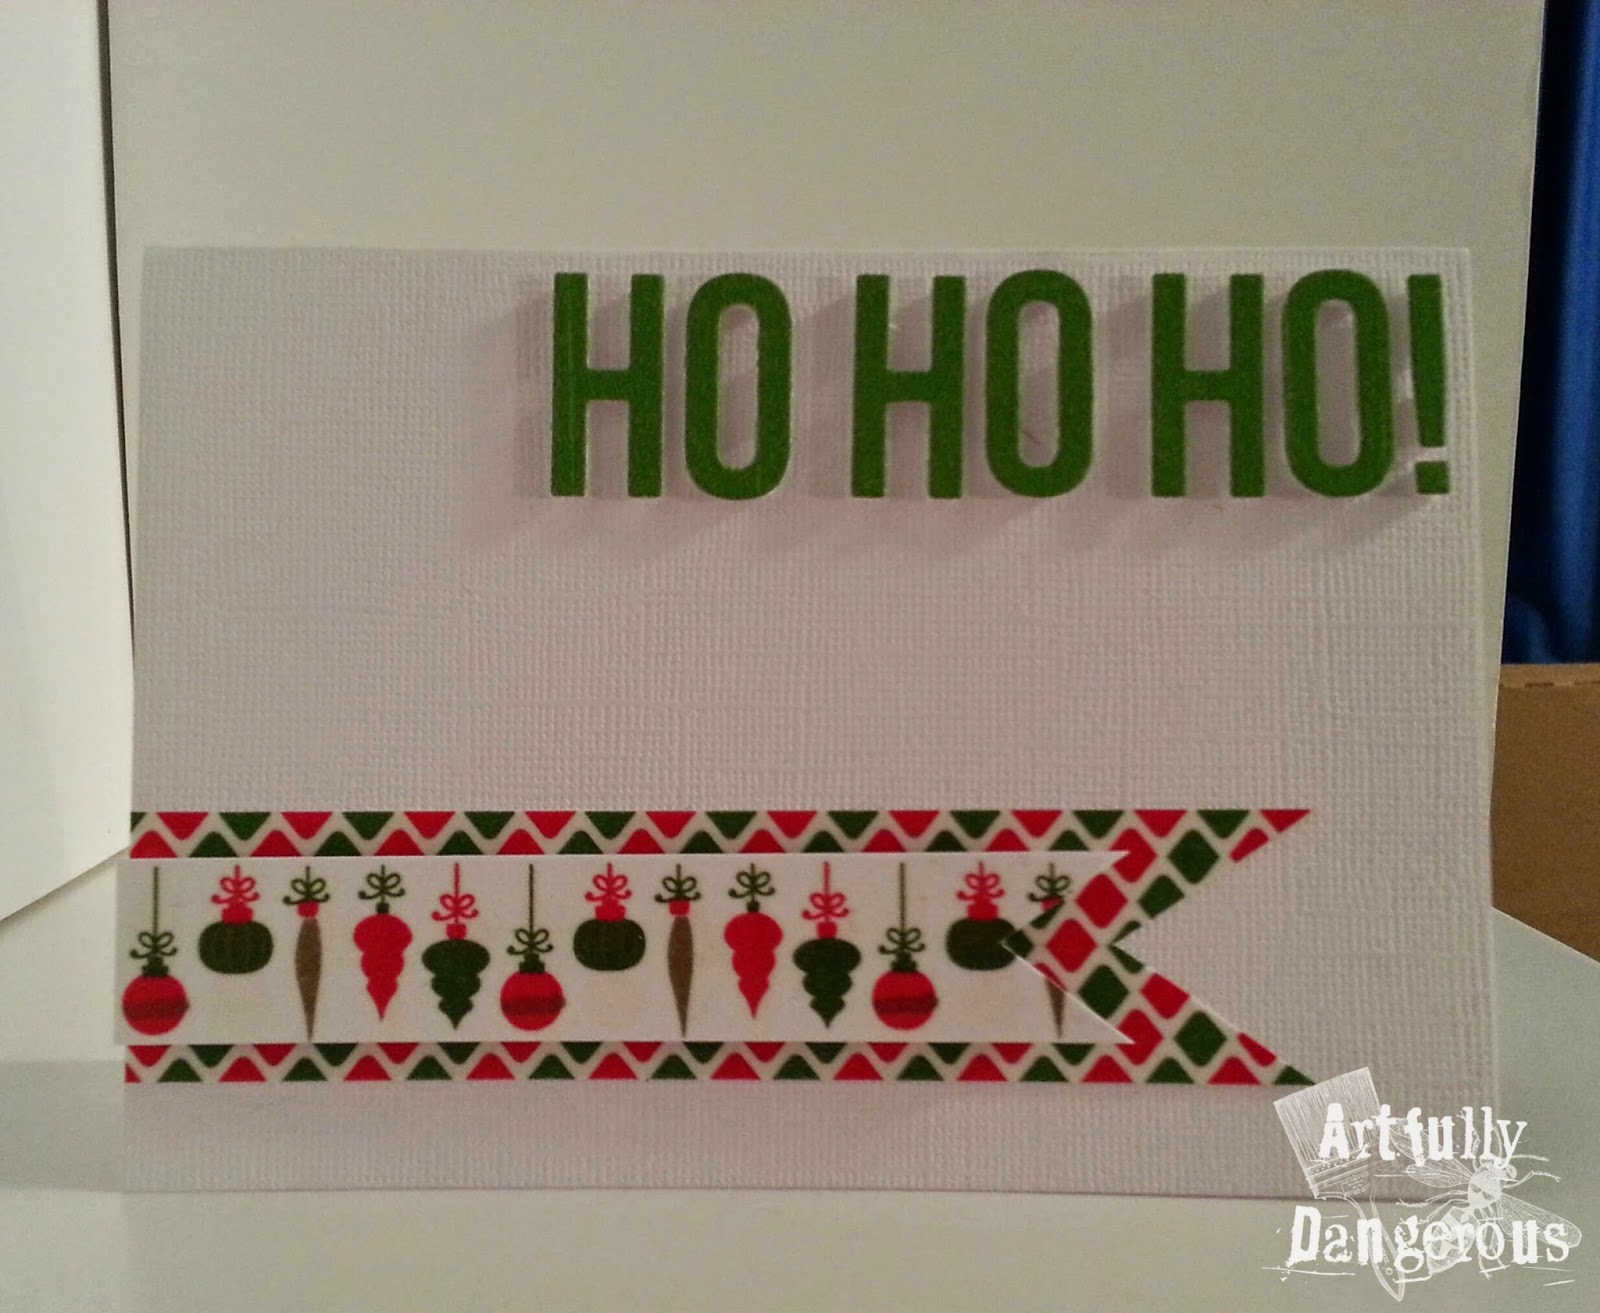
Card #3 - Ho Ho Ho!


This final card was again done the same way with one exception, instead of cutting shapes with my big shot (the letters were cut using a die) I cut 2 long strips and cut reverse triangles in the end to make layered flags.

Materials Used:

Card #1 - Kaisercraft Alphabet Die, Memory Box Hot Air Balloon and Marshmallow Clouds Dies, and Papercraft Foam Squares.

Card #2 - Kaisercraft Alphabet and Nesting Frames Dies, Papercraft Foam Squares and Glossy Accents.

Card #3 - Kaisercraft Alphabet Die, and Papercraft Foam Squares.

So you can see how easy it is to make quick and easy embellishments from something as simple as Washi Tape. Check out Auzz Trinklets N Krafts online store to see all the beautiful rolls of Washi Tape that Neha has to offer. Beware, if you are not already addicted to Washi Tape then you soon will be!

Caio for now!


 photo oldswirl_zps9e8ffa8f.png