Showing posts with label altenew educator certification. Show all posts

Friday, July 10, 2020

Altenew July 2020 Stamp/Die/Stencil/Ink Release

Hello Everyone,
Welcome back again to my blog.
Today I am sharing my project as a guest designer for Altenew again . Sorry my post is a bit long as wanted to explain on how I create my cards.


Here are my projects. Its was really a fun and a good way to challenge myself for this. Projects which I have created are show casing the new July release for Altenew.
Project 1: Luminary With Floral In "N" Out Border Die


Materials Needed:
  • Altenew Floral In N Out border die
  • Cardstock Measuring 8 inches x 13 inches ( do not cut the barcode out)
  • Glitter or Mirror Cardstock 4 3/8 inch x 4 3/8 inch
  • Glitter or Mirror cardstock 2 inches x 13 inches
  • Lights to put inside the box
  • Altenew Tabbed Die
Steps:
  • Keeping the shorter side on the top Score at 1 3/4 inches
  • Now keeping the cardstock on longer side score at 3', 6' , 9' and 12 inch. (see the picture for reference).
  • Before moving on to cut the edge put your dies on the box area to die cut the images out.
  • Now cut the areas as shown in picture. Only till the 1 3/4 inch fold.
  • Once its ready put everything together with the help of glue or strong tape.
  • Your semi finished Luminary will look like the picture below.
  • Now making the lid and the legs.
  • For the lid I took a glitter card stock which measures 2 inches x 13 inches.
  • Now score the glitter cardstock at 1/2 inch on the long side.
  • Also score on the short side at 3 inch , 6 inch, 9 inch and 12 inch.
  • For making it look like legs I used the Altenew Tabbed dies to make the legs.
  • Assemble the legs just like the box was assembled and stick at the bottom of the box.
Bottom once put together will look like this
  • Now making the lid;
  • For the lid take a glitter card stock measuring 4 3/8 inch x 4 3/8 inch
  • Score it at 5/8 inch all around and cut slits on 4 sides as shown in the picture
Once they are all assembled together the finish Luminary will look like these.

Project 2: Fold Out Flat Box Card
Materials Needed:
  • Altenew Circled Greeting Die Thanks
  • Cardstock Measuring 5 1/2 inches x 8 1/2 inches (base cardstock)
  • Cardtsock 1 inch x 5 1/2"
  • Pattern paper from Cheerful meadows paper pack 4 pcs 2 inches x 5 1/4 inch
  • back cardstock
  • Pattern paper circle slighly bigger to cover your thanks circle
  • Halftone circle dies
  • Two small circles from halftone nesting circle dies
  • Sentiment from Courageous You stamps
  • Altenew Permanent Ink pad
Steps:
First I took the cardstock 5 1/2 inch by 8 1/2" (base cardstock) and score at 2 1/8 inch, 4 1/4 inch and 6 3/8 inch.
Also score the 1 inch strip in half too.
The I glued all my pattern paper to my bases. I have got two red base , 1 flower side and one black for sentiment side.
Once I was happy with everything then I stamped my sentiments from the Stamp set Courageous You , the sentiment which I used is "You are great".
Now for the assembly of this. Take that 1 inch strip which was scored in half and stick on the one side of the base cardstock from inside ( this will look like a flap). apply some adhesive on the other 1/2inch and stick on the other side of the base card stock making it look like a box.
Now coming on the other side.
First I cut out my Thanks circle on a black cardstock then I took a circle die which is slightly bigger than your thanks circle and die cut that out. Once this was done I used the same circle die to cut my pattern paper circleout too.
Adhering that to the corner of your box. This was not that tricky. Here is how I did. I used those two smaller circle and scored each of them in half . See the picture below on how I stuck them on the base box. ( I used one of the button punches instead of circle dies)


Then on top of this I stuck my circle thanks. To finish of my card I used some of the clear heart embellishments.

Project 3: Slimline Congrats cards
Materials Needed:
  • Altenew Courageous You Stamp set
  • Altenew Mega label Stamp
  • Bristol Smooth 8 3/4 inch x 4 3/4 inch
  • Back Cardtsock 9 inch x 5 inch
  • Altenew Black permanent Ink
  • White gel pen
  • Watercolour Brush markers.
  • Masking Paper
Steps:
For this card first I stamped my images using a making technique on Bristol Smooth paper.
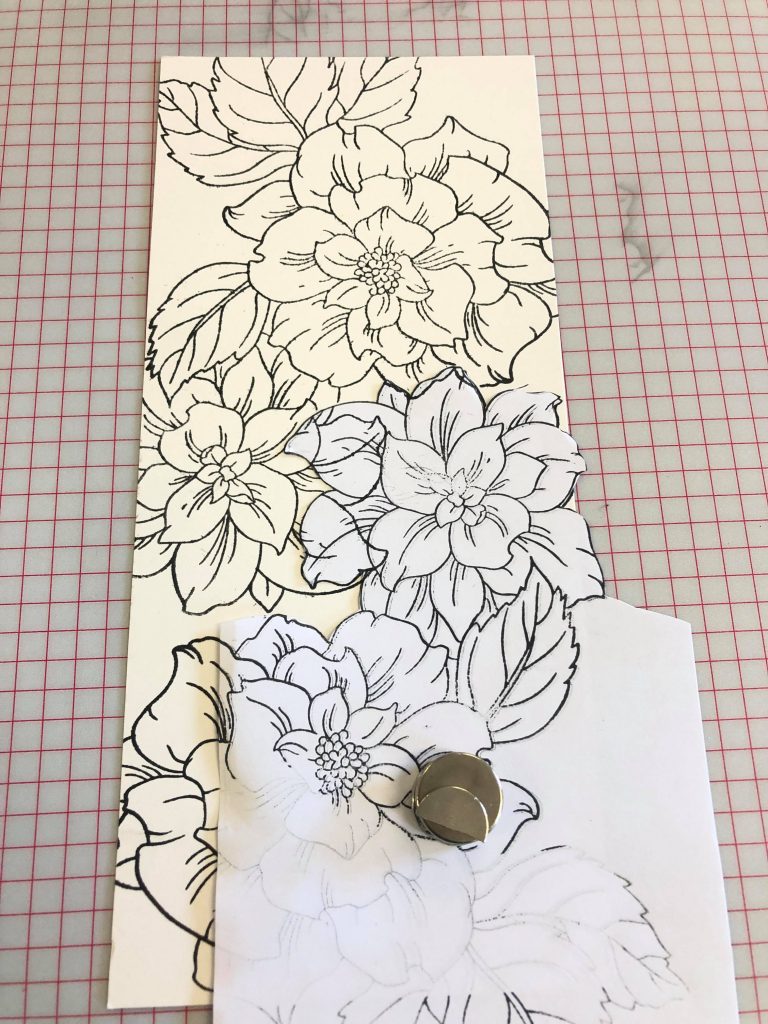
Once stamped my flowers I went and coloured my background with the Altenew watercolour Brush markers. I have used the following colours
  • Ruby red ( Flowers)
  • Midnight Violet ( Flowers)
  • Sea Breeze ( Flowers)
  • Turquoise( Flowers)
  • Evening Grey (background)
  • Moss (leaf)
  • Limeade (leaf)
  • Fresh Lemon ( Flowers)
After they were all dried I used white gel pen to give some little dots in between my flowers.
For my sentiments I stamped congrats with mega label and stuck on my card finishing it with the back mat behind. I also added some pearls on my card.
Project 4: Card with Floral In N Out Border Die
Materials Needed:
  • Altenew Floral In N Out Border Die
  • Altenew Starry Flower Stamp
  • Altenew Satin white Sequins
  • Altenew Coral Charm Stamps
  • Black Cardstock 7 inch x 3 inch
  • White Cardstock 7 inch x 3 inch
  • Kraft Cardstock 4 3/4 inch x 6 3/4 inch
  • Kraft cardstock 2 1/4 inch x 6 3/4 inch
  • Black cardstock 2 1/4 inch x 6 3/4 inch
  • Altenew Black permanent Ink
  • White spray
Steps:
First I took the piece if Kraft cardstock which measures 2 1/4 inch x 6 3/4 inch.
I die cut out the border from that Strip of cardstock.
Then I took the back card stock with same measurements I turned my border die and outlined the die on the black cardstock.


Then fussy cut my out line to give a back backing on the cut out image.
On my base Kraft cardstock I then went and made a line slightly on the left of the middle of my card stock so that I can stamp some foliage on the other side of the card . For my foliage I have used the coral charm stamps.
After that I stock my die cut out Border with the Black mat on the line of the back cardstock. Sprayed some white and put my Satin white emblishments.
Stamped my sentiments from the stamp set called Starry flowers and then got my black and white backing on the back of the base Kraft cardstock.
Product Links: Please click HERE to see the links to our new products. Here is the link to the July 2020 release collection page, listing all of the new products: https://altenew.com/collections/summer-fun-release
Layering Guides: Please click HERE.
Hoping I have inspired some of you.
Please do leave me a comment and your tips for any improvements needed.
Regards

neha

Saturday, May 18, 2019

Altenew Creative Watercolor Media

Hi Everyone,

Today I am here to show one more project for Altenew.  For this purpose I have selected another one of my favorite Class Creative watercolour Media. 

For this project I wanted to try and improve my coloring techniques by using the Altenew Watercolour Palette  and Altenew Water brush Pens.

 I have used the stamp sets Build-A-Flower: Anemone Coronaria and for the sentiment I chose my "happy" word from the Script Words 2. " for you" is from the halftone happy stamp set.


Basic Techniques and Process for making this Card:
  • For making this card , I have used the basic technique of masking.
  • First I planned how many flowers I want on the top and then stamped them randomly on my strathmore Watercolor Paper Cold press using distress ink Antique Linen.

  • Once I have got my top flowers I masked them with the flowers which I got by stamping them on a paper separately and fussy cutting them out as I wanted no white background in the flowers.
  • I have done the same techniques for the leaves as well and masked few to see the over lapping ones coming underneath the flowers.
  • After I was happy with my stamped images I started my coloring process.
  • Foremost I did a brown water wash outside my outline images. So spreading the brown outline with more water.
  • Then slowly and patiently I started doing every alternate petal at a time so that they are not wet as when I do the petal in between the two I did before. 


  • For the middle of the flowers I did black dots with watercolor.
  • For a bit of enhancement I also splattered some white with my brush.
  • My sentiment "happy" was cut two times on white card stock and 1 pcs in gold glitter card stock to have a raised effect.
  • "for you" I stamped with the Altenew New Antique Gold Pigment Ink on a black card stock.

Its amazing when you are challenged with something out of your comfort zone and try something new. I really would like to Thank Virginia and Erum for their support and love.

I look forward to create more and present myself more under their beautiful guidance.   

Hope you all like it.
Regards
Neha


Wednesday, April 17, 2019

Altenew as Easy as ABC with Therese Calvird

An amazing month of April started with Altenew class in Melbourne with Tasnim and Therese. Finally I got to meet them in person.

Now coming to my second last lesson for AECP. For this lesson I took Therese Calvird class at the Academy called Easy as ABC. 

The Lesson was all about to make the best use of your Alphabet stamp and Dies. With the help of Therese Video here is what I have created.


For this card I have used Botanical You stamp set. And for making the best use of this stamp, I have used all the sentiments which were in this stamp set. Created my background with heat embossing. I have also used the layering word "you"  with heat embossing.


After finishing my heat embossing I have used Picket fence Blending brush to do my background . I have used the ink pads from Altenew which are lagoon, Volcano lake, and Mountain Mist.


After completing I die cut out my word 'You' from the base base cardstock as well as the leafy YOU with the help of the coordinating dies. I mounted the leafy YOU with the foam to give extra dimensions so that they look like popped out from the base.  


To finish my card I added a strip of sentiment heat embossed again on a black strip.

Hoping to finish my last lessons soon with my AECP.

Regards
neha


Wednesday, April 10, 2019

Watercolor Basics & Beyond using my watercolour Pan as Ink

Welcome back to my blog. 

Today, I am sharing another technique which I learned from Jennifer Rzasa. Absolutely amazing technique. In this one I have used my pan colours as my inks and spritzing with water before stamping. The results are really beautiful.

For this card , I used the stamp set called Dainty bouquet stamp. First taking the big stamp on my acrylic block  and using the teal colour along with the waterbrush pen I applied it on my stamps. TIP: make sure when you are lifting the colour it should not be watery otherwise it will get smudged when stamped therefore it should have lot of pigment in it.

Once I finished doing with my large one . I placed the big one in such a way that they look like one stem and did all the same step as the first one.

Once I applied the colour I sprayed a bit of water on it so that the dry colours are all reactivated.


Now with the layering of just the flowers I have used the second medium and darker teal from my ink pads to have their layers stamped on top of each other.


For my sentiments I have used it from Build-A- Flower camellia with a jet black ink. Also a bit of splatter with black was done to finish the card.

Hope you all like it. Don't forget to leave me some comments.
regards
neha


Tuesday, March 26, 2019

Creating background magic with Altenew Background stamps

I am once again back this month with my another step towards my AECP course Completion. 

Today I have created a card using the Altenew background Stamp Pinstripe. For this wonderful technique I would like to give credit to the awesome lady Laurel Beard for sharing her knowledge through her class about using background stamps in different forms. 

Here is my card.

For making this card I have used a piece of Vellum where I stamped with my Pinstrip Stamp using versafine and white embossing powered. Now here is a trick I rotated the same stamp 90 degree and stamped again using versamark and white embossing powder. ( Since it was already stamped and embossed once so i have few blank spaces in between which added extra features to it when I heat embossed it again.) 


Once the embossing is cooled down I used my Altenew Artist markers Mango Smootie and Ruby red on the embossed side of the vellum ( I know I have also used a blue but later on I did not like how blue turned so I cut that out from my final card view LOL ) . Once all colored I took rubbing alcohol in my spray bottle and sprayed onto the vellum which is why you can see in the picture it was bit curled. Then to get the final picture I trimmed out the blue and got this mat on a back cardstock to put them on a neenah solar white card base. 


For My sentiments I have cut out word happy ( Scripty word 2 ) on a foam and also on a white cardstock. And my birthday stamp is heat embossed with white from Birthday Builder Stamps.


Hope you all like the card. Please do not forget to leave me your beautiful comments.
Regards
neha

 photo oldswirl_zps9e8ffa8f.png