
Hello Everyone,
Welcome back again to my blog.
Today I am sharing my project as a guest designer for Altenew again . Sorry my post is a bit long as wanted to explain on how I create my cards.

Here are my projects. Its was really a fun and a good way to challenge myself for this. Projects which I have created are show casing the new July release for Altenew.


Materials Needed:
- Altenew Floral In N Out border die
- Cardstock Measuring 8 inches x 13 inches ( do not cut the barcode out)
- Glitter or Mirror Cardstock 4 3/8 inch x 4 3/8 inch
- Glitter or Mirror cardstock 2 inches x 13 inches
- Lights to put inside the box
- Altenew Tabbed Die
- First take a piece of cardstock measuring 8 inches x 13 inches


- Keeping the shorter side on the top Score at 1 3/4 inches
- Now keeping the cardstock on longer side score at 3', 6' , 9' and 12 inch. (see the picture for reference).

- Before moving on to cut the edge put your dies on the box area to die cut the images out.
- Now cut the areas as shown in picture. Only till the 1 3/4 inch fold.
- Once its ready put everything together with the help of glue or strong tape.
- Your semi finished Luminary will look like the picture below.

- Now making the lid and the legs.
- For the lid I took a glitter card stock which measures 2 inches x 13 inches.

- Now score the glitter cardstock at 1/2 inch on the long side.
- Also score on the short side at 3 inch , 6 inch, 9 inch and 12 inch.
- For making it look like legs I used the Altenew Tabbed dies to make the legs.

- Assemble the legs just like the box was assembled and stick at the bottom of the box.

- Now making the lid;
- For the lid take a glitter card stock measuring 4 3/8 inch x 4 3/8 inch
- Score it at 5/8 inch all around and cut slits on 4 sides as shown in the picture

Project 2: Fold Out Flat Box Card
- Altenew Circled Greeting Die Thanks
- Cardstock Measuring 5 1/2 inches x 8 1/2 inches (base cardstock)
- Cardtsock 1 inch x 5 1/2"
- Pattern paper from Cheerful meadows paper pack 4 pcs 2 inches x 5 1/4 inch
- back cardstock
- Pattern paper circle slighly bigger to cover your thanks circle
- Halftone circle dies
- Two small circles from halftone nesting circle dies
- Sentiment from Courageous You stamps
- Altenew Permanent Ink pad
First I took the cardstock 5 1/2 inch by 8 1/2" (base cardstock) and score at 2 1/8 inch, 4 1/4 inch and 6 3/8 inch.
Also score the 1 inch strip in half too.
The I glued all my pattern paper to my bases. I have got two red base , 1 flower side and one black for sentiment side.

Now for the assembly of this. Take that 1 inch strip which was scored in half and stick on the one side of the base cardstock from inside ( this will look like a flap). apply some adhesive on the other 1/2inch and stick on the other side of the base card stock making it look like a box.
First I cut out my Thanks circle on a black cardstock then I took a circle die which is slightly bigger than your thanks circle and die cut that out. Once this was done I used the same circle die to cut my pattern paper circleout too.
Adhering that to the corner of your box. This was not that tricky. Here is how I did. I used those two smaller circle and scored each of them in half . See the picture below on how I stuck them on the base box. ( I used one of the button punches instead of circle dies)


Then on top of this I stuck my circle thanks. To finish of my card I used some of the clear heart embellishments.
Project 3: Slimline Congrats cards
- Altenew Courageous You Stamp set
- Altenew Mega label Stamp
- Bristol Smooth 8 3/4 inch x 4 3/4 inch
- Back Cardtsock 9 inch x 5 inch
- Altenew Black permanent Ink
- White gel pen
- Watercolour Brush markers.
- Masking Paper
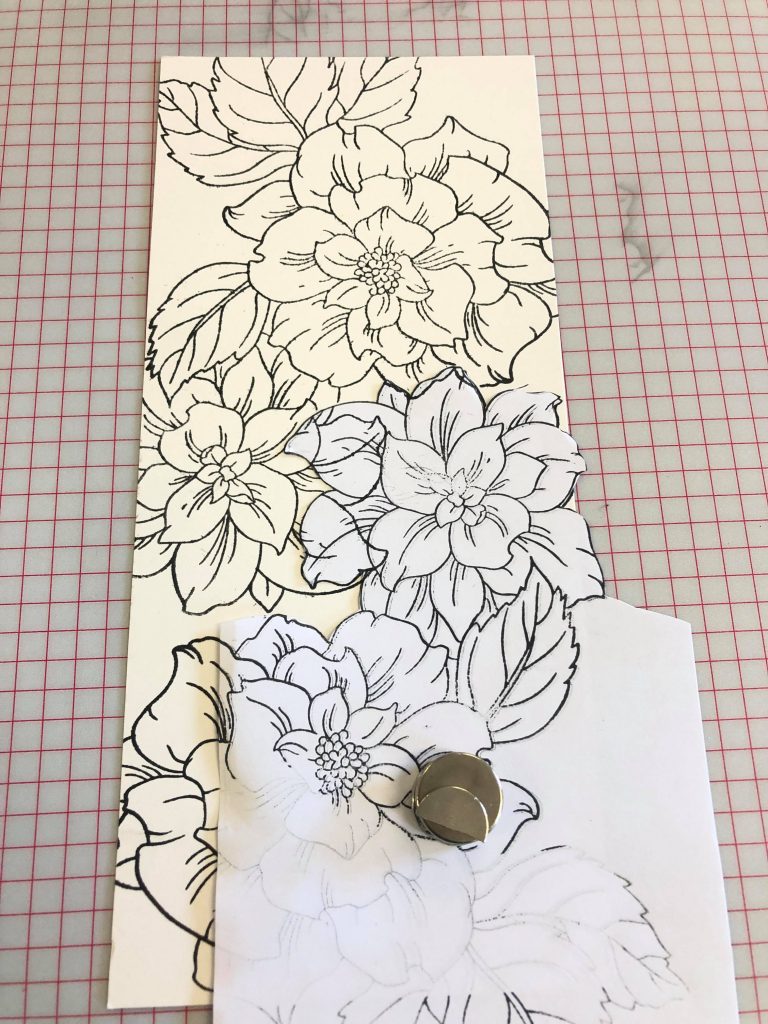
For this card first I stamped my images using a making technique on Bristol Smooth paper.
- Ruby red ( Flowers)
- Midnight Violet ( Flowers)
- Sea Breeze ( Flowers)
- Turquoise( Flowers)
- Evening Grey (background)
- Moss (leaf)
- Limeade (leaf)
- Fresh Lemon ( Flowers)

Project 4: Card with Floral In N Out Border Die
- Altenew Floral In N Out Border Die
- Altenew Starry Flower Stamp
- Altenew Satin white Sequins
- Altenew Coral Charm Stamps
- Black Cardstock 7 inch x 3 inch
- White Cardstock 7 inch x 3 inch
- Kraft Cardstock 4 3/4 inch x 6 3/4 inch
- Kraft cardstock 2 1/4 inch x 6 3/4 inch
- Black cardstock 2 1/4 inch x 6 3/4 inch
- Altenew Black permanent Ink
- White spray
First I took the piece if Kraft cardstock which measures 2 1/4 inch x 6 3/4 inch.
I die cut out the border from that Strip of cardstock.
Then I took the back card stock with same measurements I turned my border die and outlined the die on the black cardstock.


Then fussy cut my out line to give a back backing on the cut out image.
On my base Kraft cardstock I then went and made a line slightly on the left of the middle of my card stock so that I can stamp some foliage on the other side of the card . For my foliage I have used the coral charm stamps.

Stamped my sentiments from the stamp set called Starry flowers and then got my black and white backing on the back of the base Kraft cardstock.
Layering Guides: Please click HERE.

Please do leave me a comment and your tips for any improvements needed.
Regards
neha

No comments:
Post a Comment